
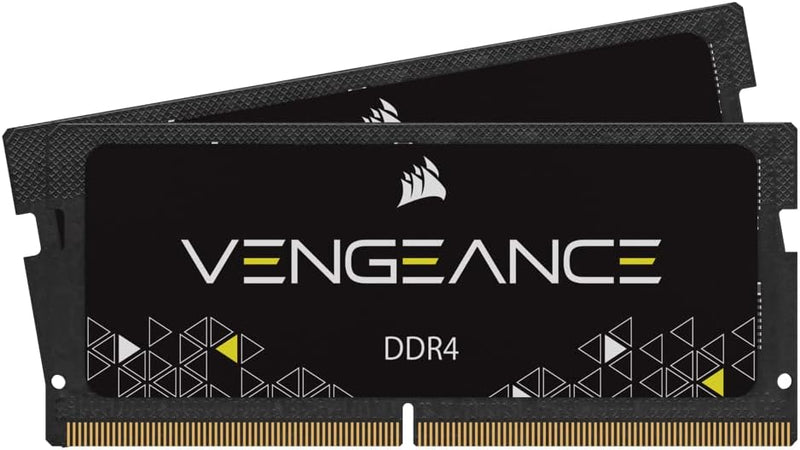


How to Replace or Upgrade Laptop SODIMM RAM
SODIMM laptop RAM upgrades are among the most accessible hardware improvements available for non-soldered notebooks — no soldering, no special certifications, and the process takes under 30 minutes. The critical first step is confirming the laptop actually has upgradeable SODIMM slots rather than soldered-on LPDDR memory. According to Notebookcheck, soldered RAM is now standard in thin-and-light and premium Ultrabook categories; upgradeable slots remain common in business laptops (ThinkPad T/E/L series, Dell Latitude), gaming laptops, and budget consumer models. Check the specific laptop's service manual or the manufacturer's memory upgrade page before purchasing.
Before You Begin: Compatibility Check
Confirm: (1) the laptop has physical SODIMM slots (not soldered), (2) the memory generation it supports (DDR4 or DDR5 — never both), (3) the number of slots, and (4) the maximum capacity per slot. Crucial's online system scanner accepts a laptop model number and returns validated compatible part numbers. This step prevents the most common mistake: purchasing the wrong generation or exceeding the slot's capacity limit.
Safety
Disconnect AC power and remove any external battery before opening the laptop. For internal non-removable batteries (the majority of laptops since 2016), shut down completely and hold the power button five seconds after unplugging to clear residual capacitor charge. Touch exposed chassis metal before handling any module to discharge static. Work on a hard, flat, non-carpeted surface.
Tools Needed
- Phillips #00 screwdriver (most common laptop bottom-panel size)
- Plastic spudger or pry tool (to release panel clips without scratching the chassis)
- Antistatic wrist strap (optional but recommended in low-humidity environments)
Quick Installation Summary
- Shut down completely, unplug power, remove external battery if present, hold power button 5 seconds.
- Remove bottom panel screws (Phillips #00) and use a plastic pry tool to release the retaining clips around the perimeter.
- Touch the chassis metal interior to discharge static before touching any components.
- Locate the SODIMM slot(s). If one slot is occupied and one is empty, adding a matching second stick activates dual-channel mode for improved bandwidth.
- To remove an existing module: press both metal retaining clips outward simultaneously — the module springs up to 30–45 degrees. Grip by the top edge and pull straight out at that angle.
- Align the notch on the new module's gold-contact edge with the key ridge in the slot. DDR4 and DDR5 notches are in different positions — if the notch does not align, stop and recheck the generation.
- Insert the module into the slot at 30–45 degrees, pressing it firmly until contacts are fully seated.
- Pivot the module flat toward the motherboard surface. Press down evenly until both metal retaining clips click into the notches on the module's edges — both clips must engage.
- Replace any thermal film, reinstall the bottom panel, reconnect power, and boot to BIOS.
- Verify the new capacity appears correctly in the BIOS memory screen, then boot to the OS to confirm. No XMP/EXPO profile enable is required on most consumer laptops.
Key Difference from Desktop RAM
SODIMM latches are small metal clips on the sides of the slot — not the large plastic levers found on desktop DIMM slots. Modules are inserted at a 30-to-45-degree angle, then pivoted flat until the clips snap into place. The insertion angle and the smaller clip mechanism are the two points where first-time laptop upgraders typically need to pause. Pressing the clips outward to release a module is also more subtle than the desktop equivalent — both clips must be pressed simultaneously for the module to spring free.
Troubleshooting in Brief
- No POST / no display: Module not fully seated — reopen, press both retaining clips firmly until they click.
- Only one module detected: Second slot not seated or incompatible part — reseat and check compatibility list.
- BIOS shows lower speed than rated: Expected on most laptops — JEDEC default only, no overclocking supported.
- Module does not fit: Stop — wrong DDR generation for the laptop's slots. Do not force.
- Random crashes post-upgrade: Run Windows Memory Diagnostic or MemTest86 from USB to test module integrity.
The full step-by-step guide with detailed safety instructions, panel-removal guidance, slot identification, and extended troubleshooting is available at studio-supplies.com/blogs/guides/sodimm-laptop-ram-upgrade-guide.
Sources & Citations
- Crucial, "Memory Support & Installation Resources," crucial.com (accessed 2026-05-31)
- Crucial / Micron, "DRAM Installation Guide (PDF)," assets.micron.com (accessed 2026-05-31)
- Tom's Hardware, "How to Install RAM in a PC," tomshardware.com (accessed 2026-05-31)
- Tom's Hardware, "How to Test RAM," tomshardware.com (accessed 2026-05-31)
- Notebookcheck, "Soldered vs. Upgradeable RAM — What to Look For," notebookcheck.net (accessed 2026-05-31)
Last verified: 2026-05-31

