
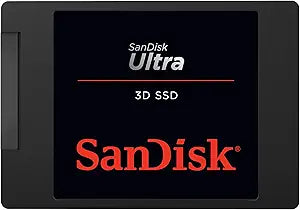
How to Install a SATA SSD and Clone Your Existing Drive
Installing a 2.5-inch SATA SSD is the most impactful upgrade available for any computer still running a spinning hard drive. At 550 MB/s sequential throughput, a SATA SSD delivers boot times, application launches, and file operation speeds that a mechanical drive simply cannot approach. According to AnandTech's Crucial MX500 review, the MX500 and Samsung 870 EVO represent the reference-class SATA SSDs for sustained-write consistency and long-term reliability — and the total time cost, including a system clone, is under an hour for most users.
Two Installation Scenarios
This guide covers both workflows:
- New secondary drive: Add the SATA SSD alongside the existing drive for extra fast storage. Connect SATA data + power cables, boot, initialize and format the drive in Disk Management (Windows) or Disk Utility (macOS). No cloning needed.
- Boot drive replacement: Replace the existing hard drive or smaller SSD with this one. Requires cloning the system first — then the swap takes 5 minutes. Cloning preserves OS, applications, settings, and all data without a clean reinstall.
Safety
Shut down fully, disconnect power, flip the PSU rocker switch off on desktops. On laptops, unplug the AC adapter and hold the power button five seconds after disconnecting for internal-battery models. Touch bare metal chassis before handling any internal component. Never insert or remove SATA drives on consumer systems while powered — hot-swap is an enterprise-backplane feature not present on consumer SATA controllers.
Tools Needed
- Phillips #1 or #2 screwdriver (desktop drive bay); Phillips #00 (laptop bottom panel)
- SATA data cable and SATA power cable (desktops; usually included with motherboard)
- 2.5" to 3.5" adapter bracket (if the desktop has only 3.5" bays; widely available)
- USB-to-SATA dock or enclosure (strongly recommended for the clone workflow — connects the new SSD externally during cloning)
Clone Workflow (Boot Drive Replacement) — Summary
- Connect the new SSD to the running computer via a USB-to-SATA dock. No initialization needed.
- Download the appropriate cloning tool:
- Crucial Storage Executive with Acronis True Image — for Crucial SSDs (MX500, BX500, etc.). Free download from Crucial's support site.
- Samsung Data Migration — for Samsung SSDs (870 EVO, 860 EVO, 850 EVO). Free download from Samsung's consumer storage support page. Destination must be a Samsung drive.
- Macrium Reflect Free — for any-to-any cloning regardless of brand. Free tier supports full disk clone with visual partition mapping.
- Run the cloning tool: select the source (internal drive) and destination (the new SSD via USB). All three tools handle partition alignment automatically. Allow the clone to complete — do not interrupt power.
- Optionally verify: change BIOS boot order temporarily to the USB-connected SSD and confirm the system boots from the clone before swapping.
- Shut down. Open the computer, swap the drives (replace old drive with new SSD in the same bay/connector). Reconnect power and boot. Update BIOS boot order if needed.
Add-Drive Workflow (Secondary Storage) — Summary
- Shut down, disconnect power, discharge static.
- Mount the SSD in a 2.5" bay (or with a 2.5"→3.5" bracket in a 3.5" bay). Connect SATA data cable to an available motherboard SATA port and SATA power cable from the PSU.
- Boot to OS. Open Disk Management (Windows: right-click Start) or Disk Utility (macOS). Initialize the new disk (GPT for UEFI systems), create a volume, format as NTFS or APFS, assign a drive letter or mount point.
Troubleshooting in Brief
- Drive not detected: Reseat both SATA data and power connectors; confirm SATA port is enabled in BIOS.
- Clone fails on bad sectors: Run SMART health check first (CrystalDiskInfo on Windows). A drive with reallocated sectors needs backup first, not cloning.
- System boots to old drive after swap: Update BIOS boot order — move new SSD to top.
- Partition alignment concerns: Not an issue with Acronis True Image, Samsung Data Migration, or Macrium Reflect — all align automatically.
SATA vs. NVMe — When SATA Is Still the Right Call
For systems without an M.2 slot, SATA SSD is the only modern SSD option. For mass storage in secondary bays where sequential throughput is not the bottleneck, SATA's cost-per-gigabyte advantage over NVMe is meaningful. For primary boot drives in systems with an available Gen3 or Gen4 M.2 slot, an NVMe drive is the faster choice. According to Tom's Hardware's SSD benchmark coverage, the Crucial MX500 and Samsung 870 EVO remain the top-rated 2.5-inch SATA options through mid-2026 for reliability and sustained-write consistency.
The full guide with desktop and laptop installation steps, cloning software walkthroughs, bad-sector recovery notes, and full troubleshooting is at studio-supplies.com/blogs/guides/sata-ssd-install-and-clone-guide.
Sources & Citations
- Crucial, "SSD Support Articles & FAQs," crucial.com (accessed 2026-05-31)
- Crucial, "Storage Executive (Acronis True Image cloning)," crucial.com (accessed 2026-05-31)
- Samsung, "Consumer Storage Tools (Samsung Data Migration)," semiconductor.samsung.com (accessed 2026-05-31)
- Tom's Hardware, "Best SSDs for 2026," tomshardware.com (accessed 2026-05-31)
- AnandTech, "The Crucial MX500 Review," anandtech.com (accessed 2026-05-31)
Last verified: 2026-05-31


